¶ Graphic Card Setting
¶ 1. Overview
This document provides a comprehensive guide for the configuration and operation of the graphic card.
- Key Features: Introducing how to set NVIDIA and AMD resolutions, and some precautions.
- Applications: When using some devices such as MCTRL4K, MX40Pro, etc., the maximum width and height that can be set on the software interface is limited to 4092. At this time, you need to use the graphics card to set a custom resolution and force output to the sending card.
¶ 2. Setup Steps
¶ 2.1 NVIDIA graphic card
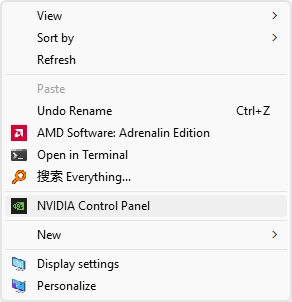
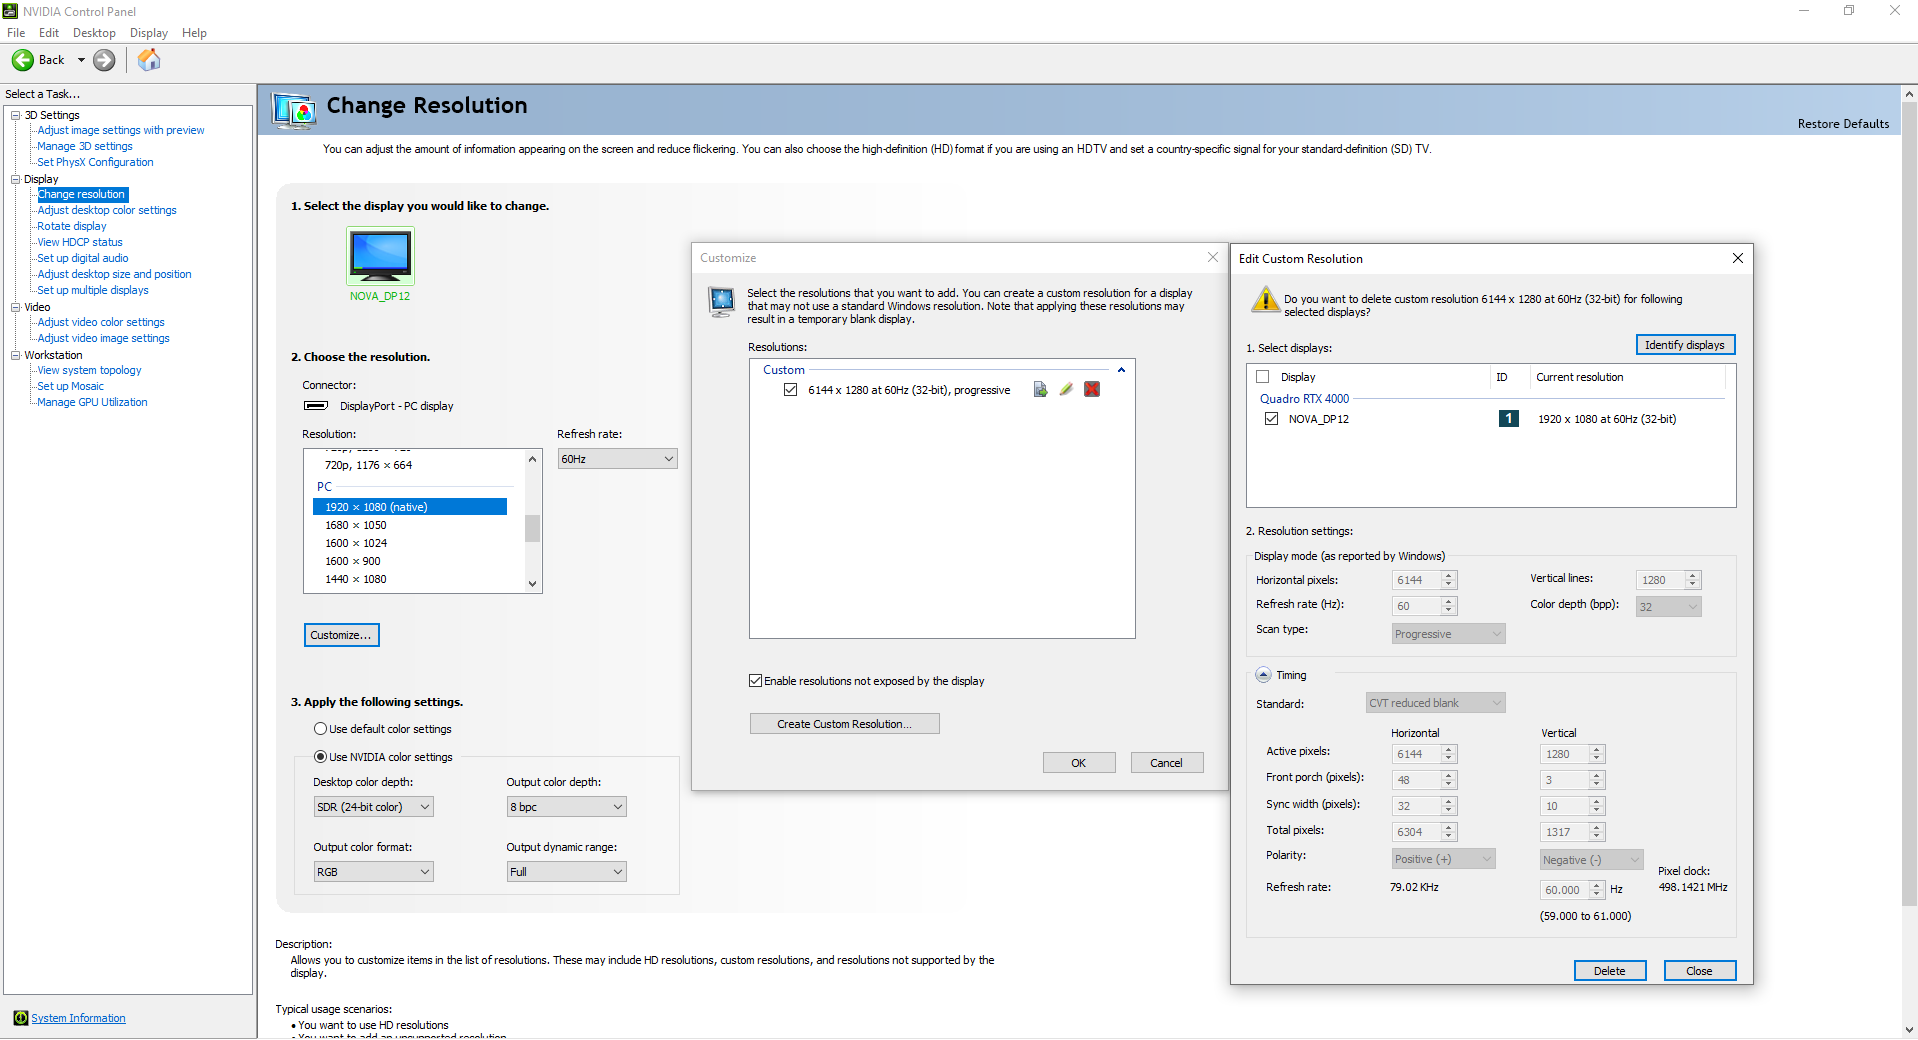
- Right-click on the computer desktop and select NVIDIA Control Panel.
- In the "Change resolution" interface, click “Create Custom Resolution” and enter the required resolution.
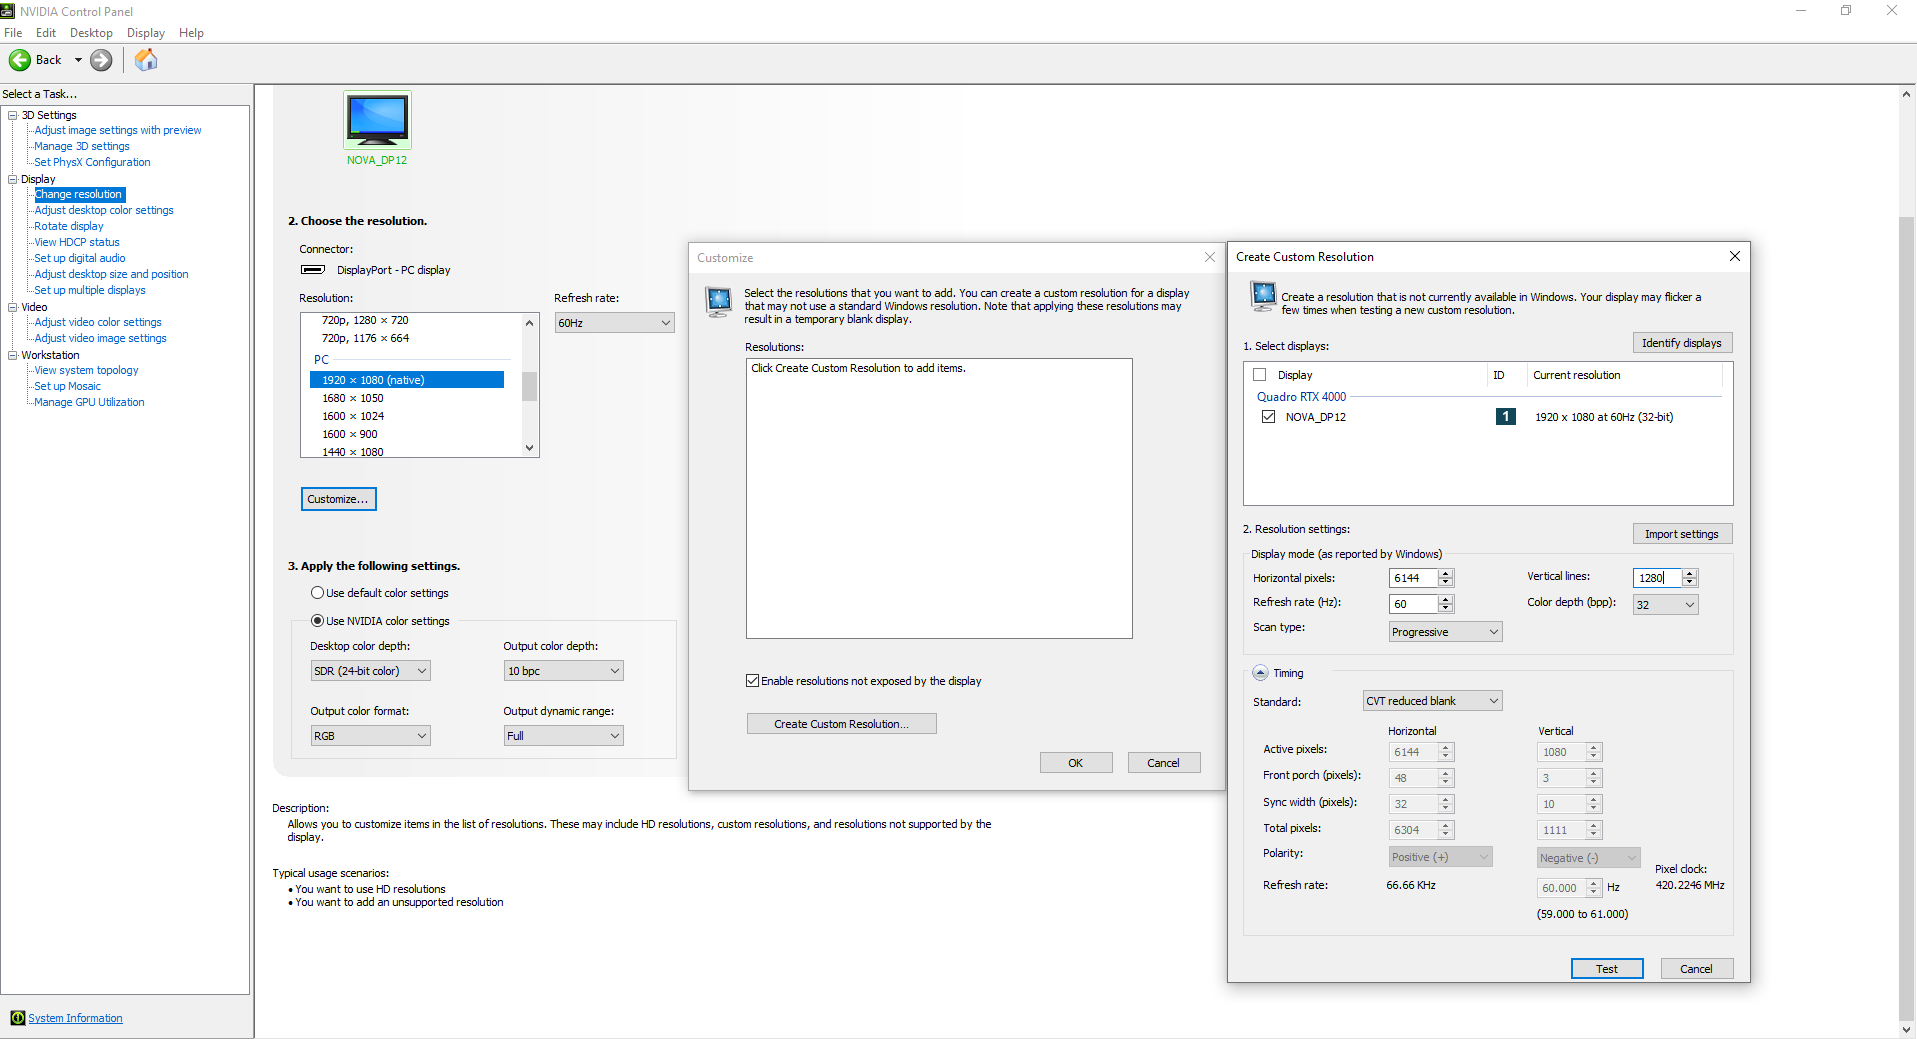
- During the test, the monitor will flash black several times. After confirmation, select the resolution you just created on the Resolution interface and apply. After the settings are completed, confirm that the graphics card Output dynamic range is full (0-255). When it is limited (16-235), black will be displayed as gray.

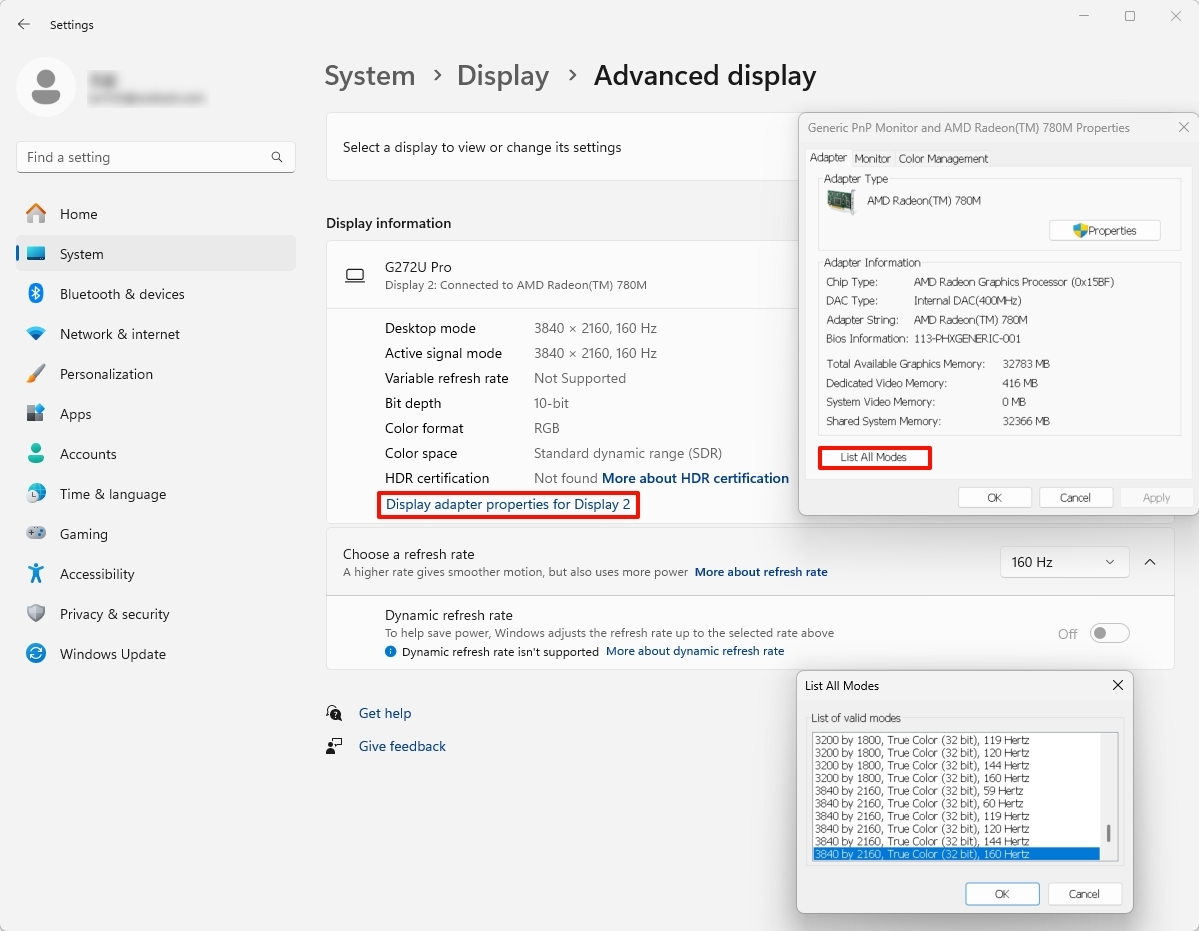
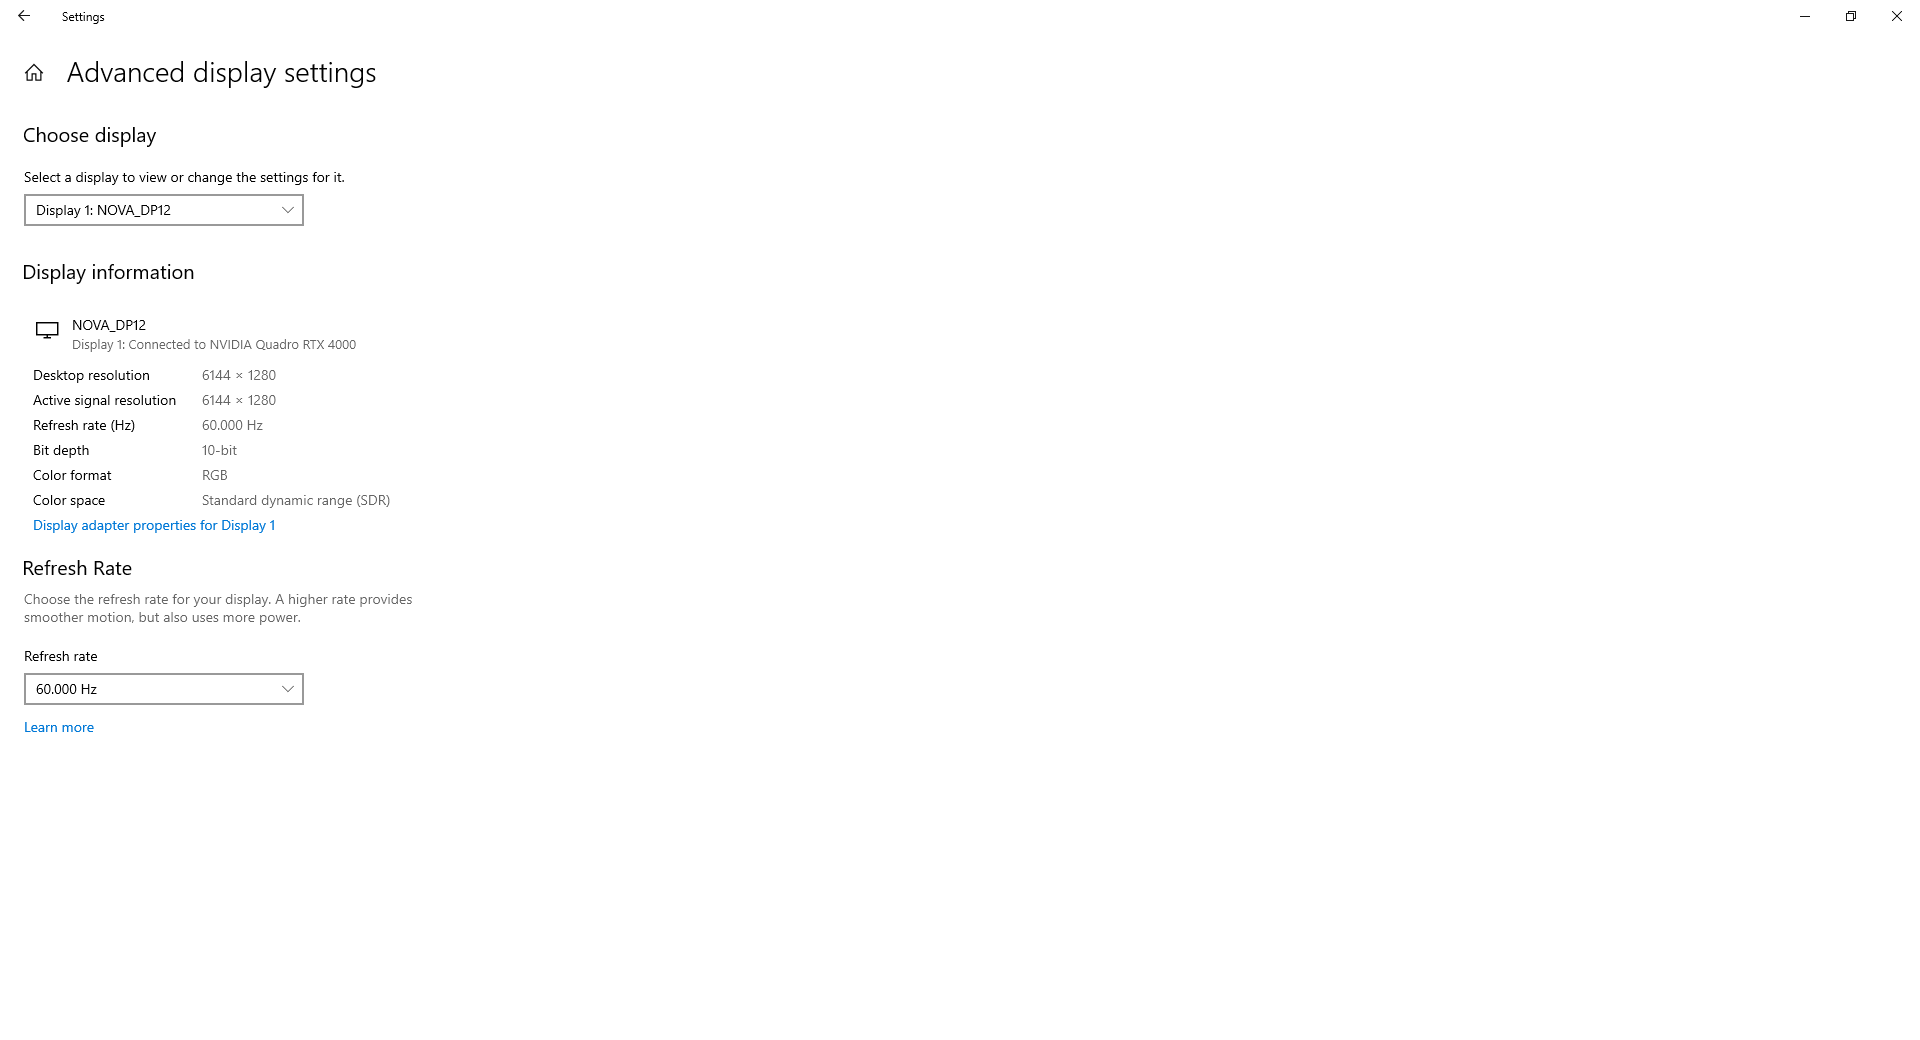
- Then go to the System-Display-Advanced display interface to confirm that the system output is normal and consistent with the requirements.
¶ 2.2 AMD graphic card
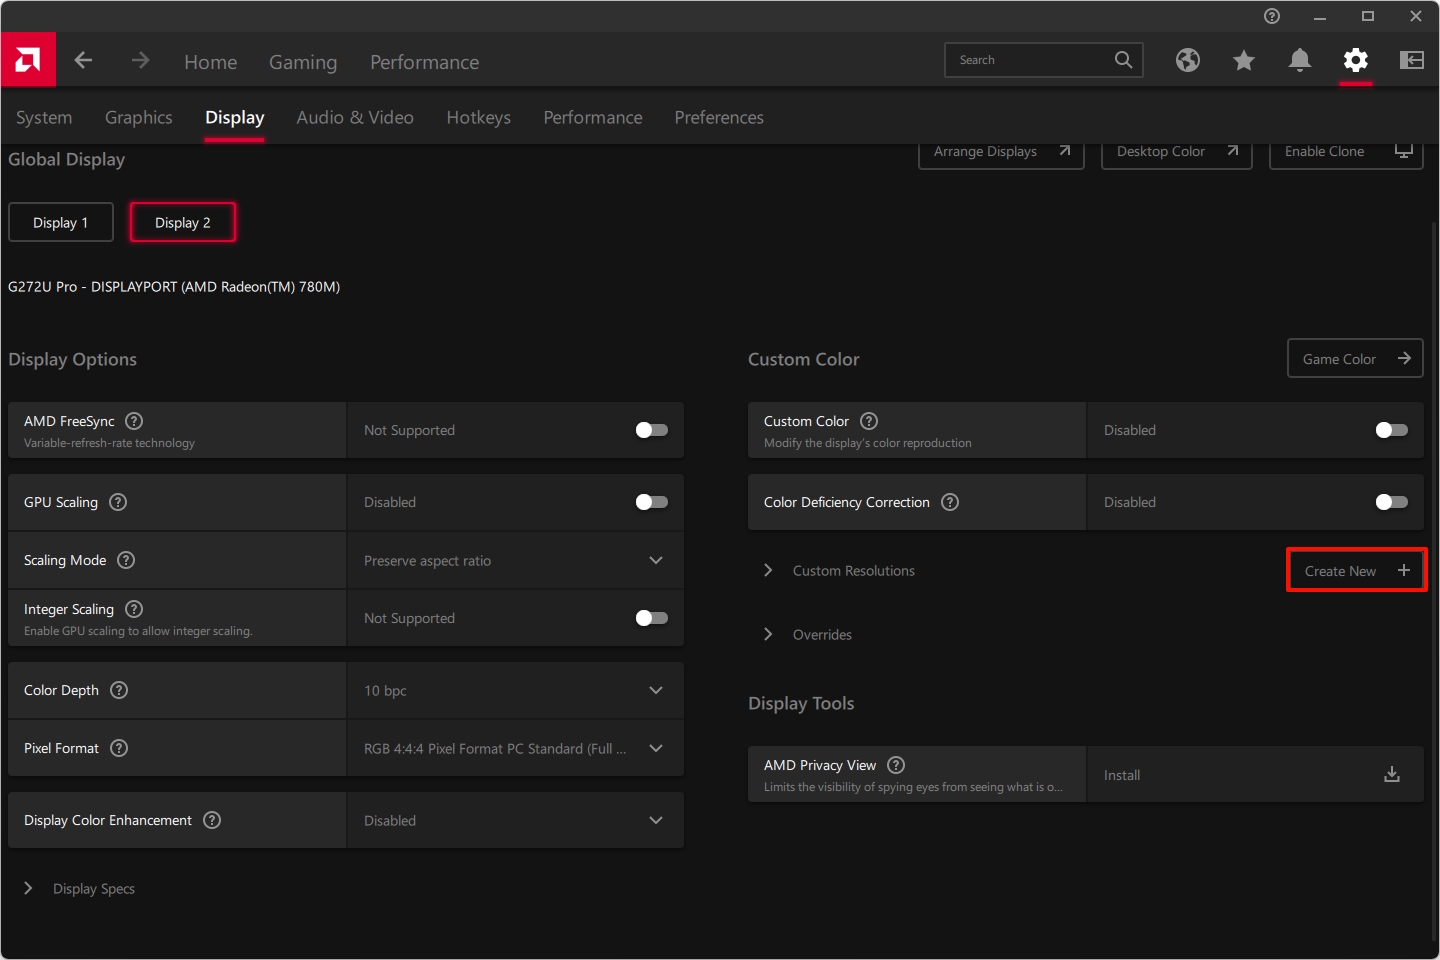
- Right-click on the computer desktop and select AMD Software Adrenalin Edition.
- In the AMD software, select the Display whose resolution you want to change and click “Create New” to start creating a custom resolution, here we take 6144x1280@60Hz RGB444 10bit as an example..
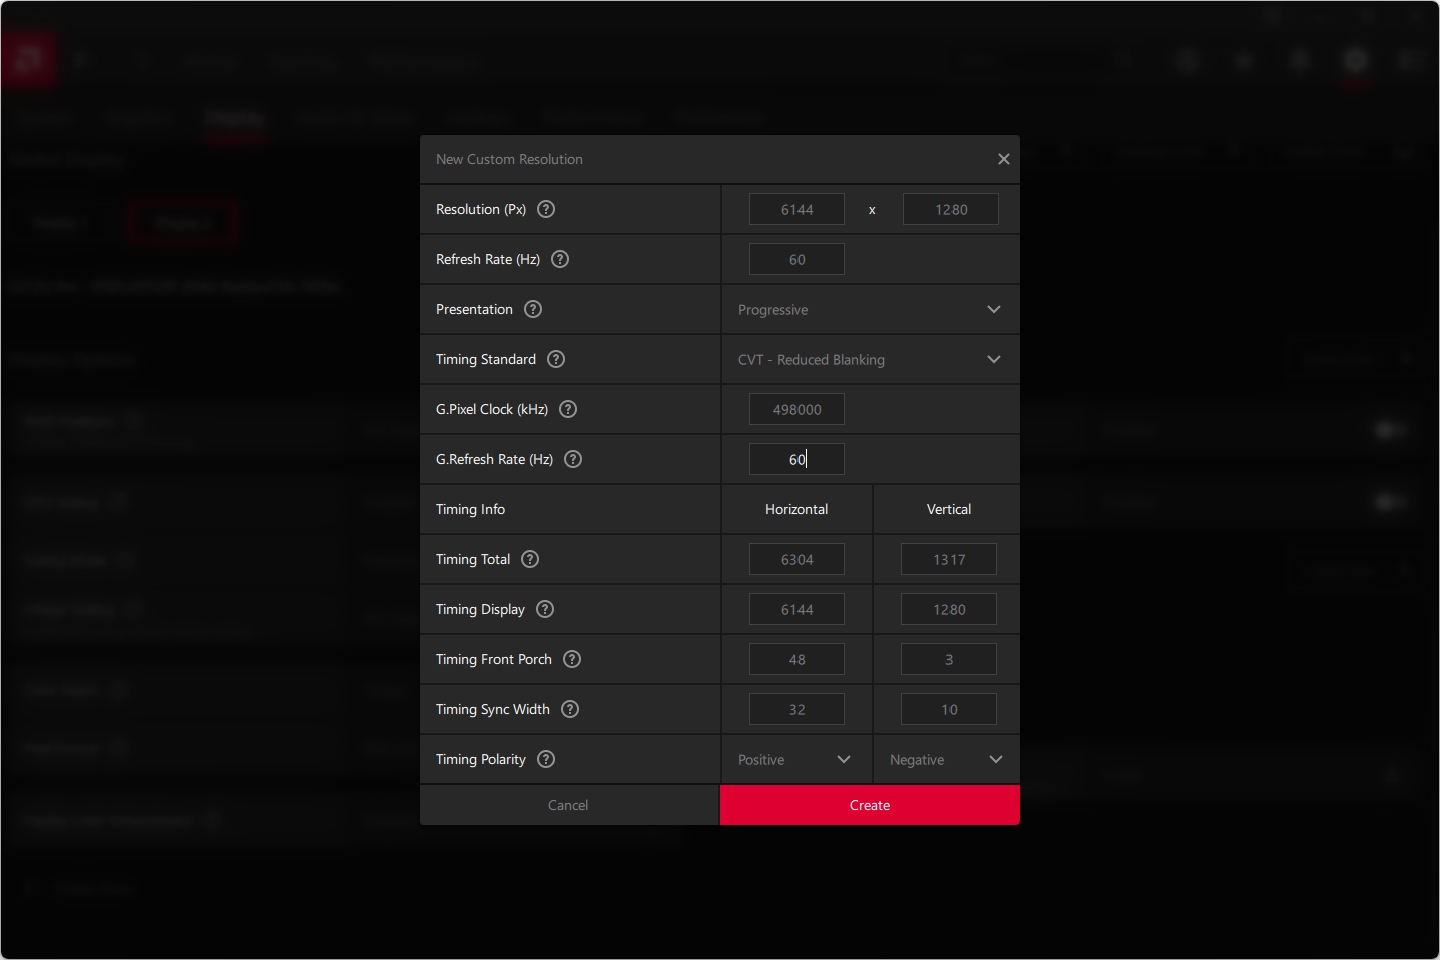
- Enter the required resolution and frame rate, select CVT-Reduced Blanking to automatically generate the parameters, and then click Create.
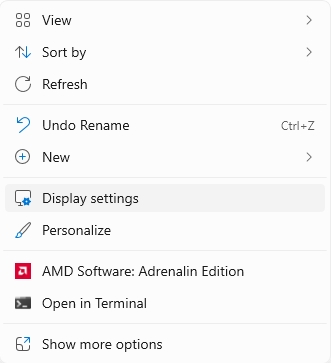
- Right-click on the computer desktop and select Display settings.
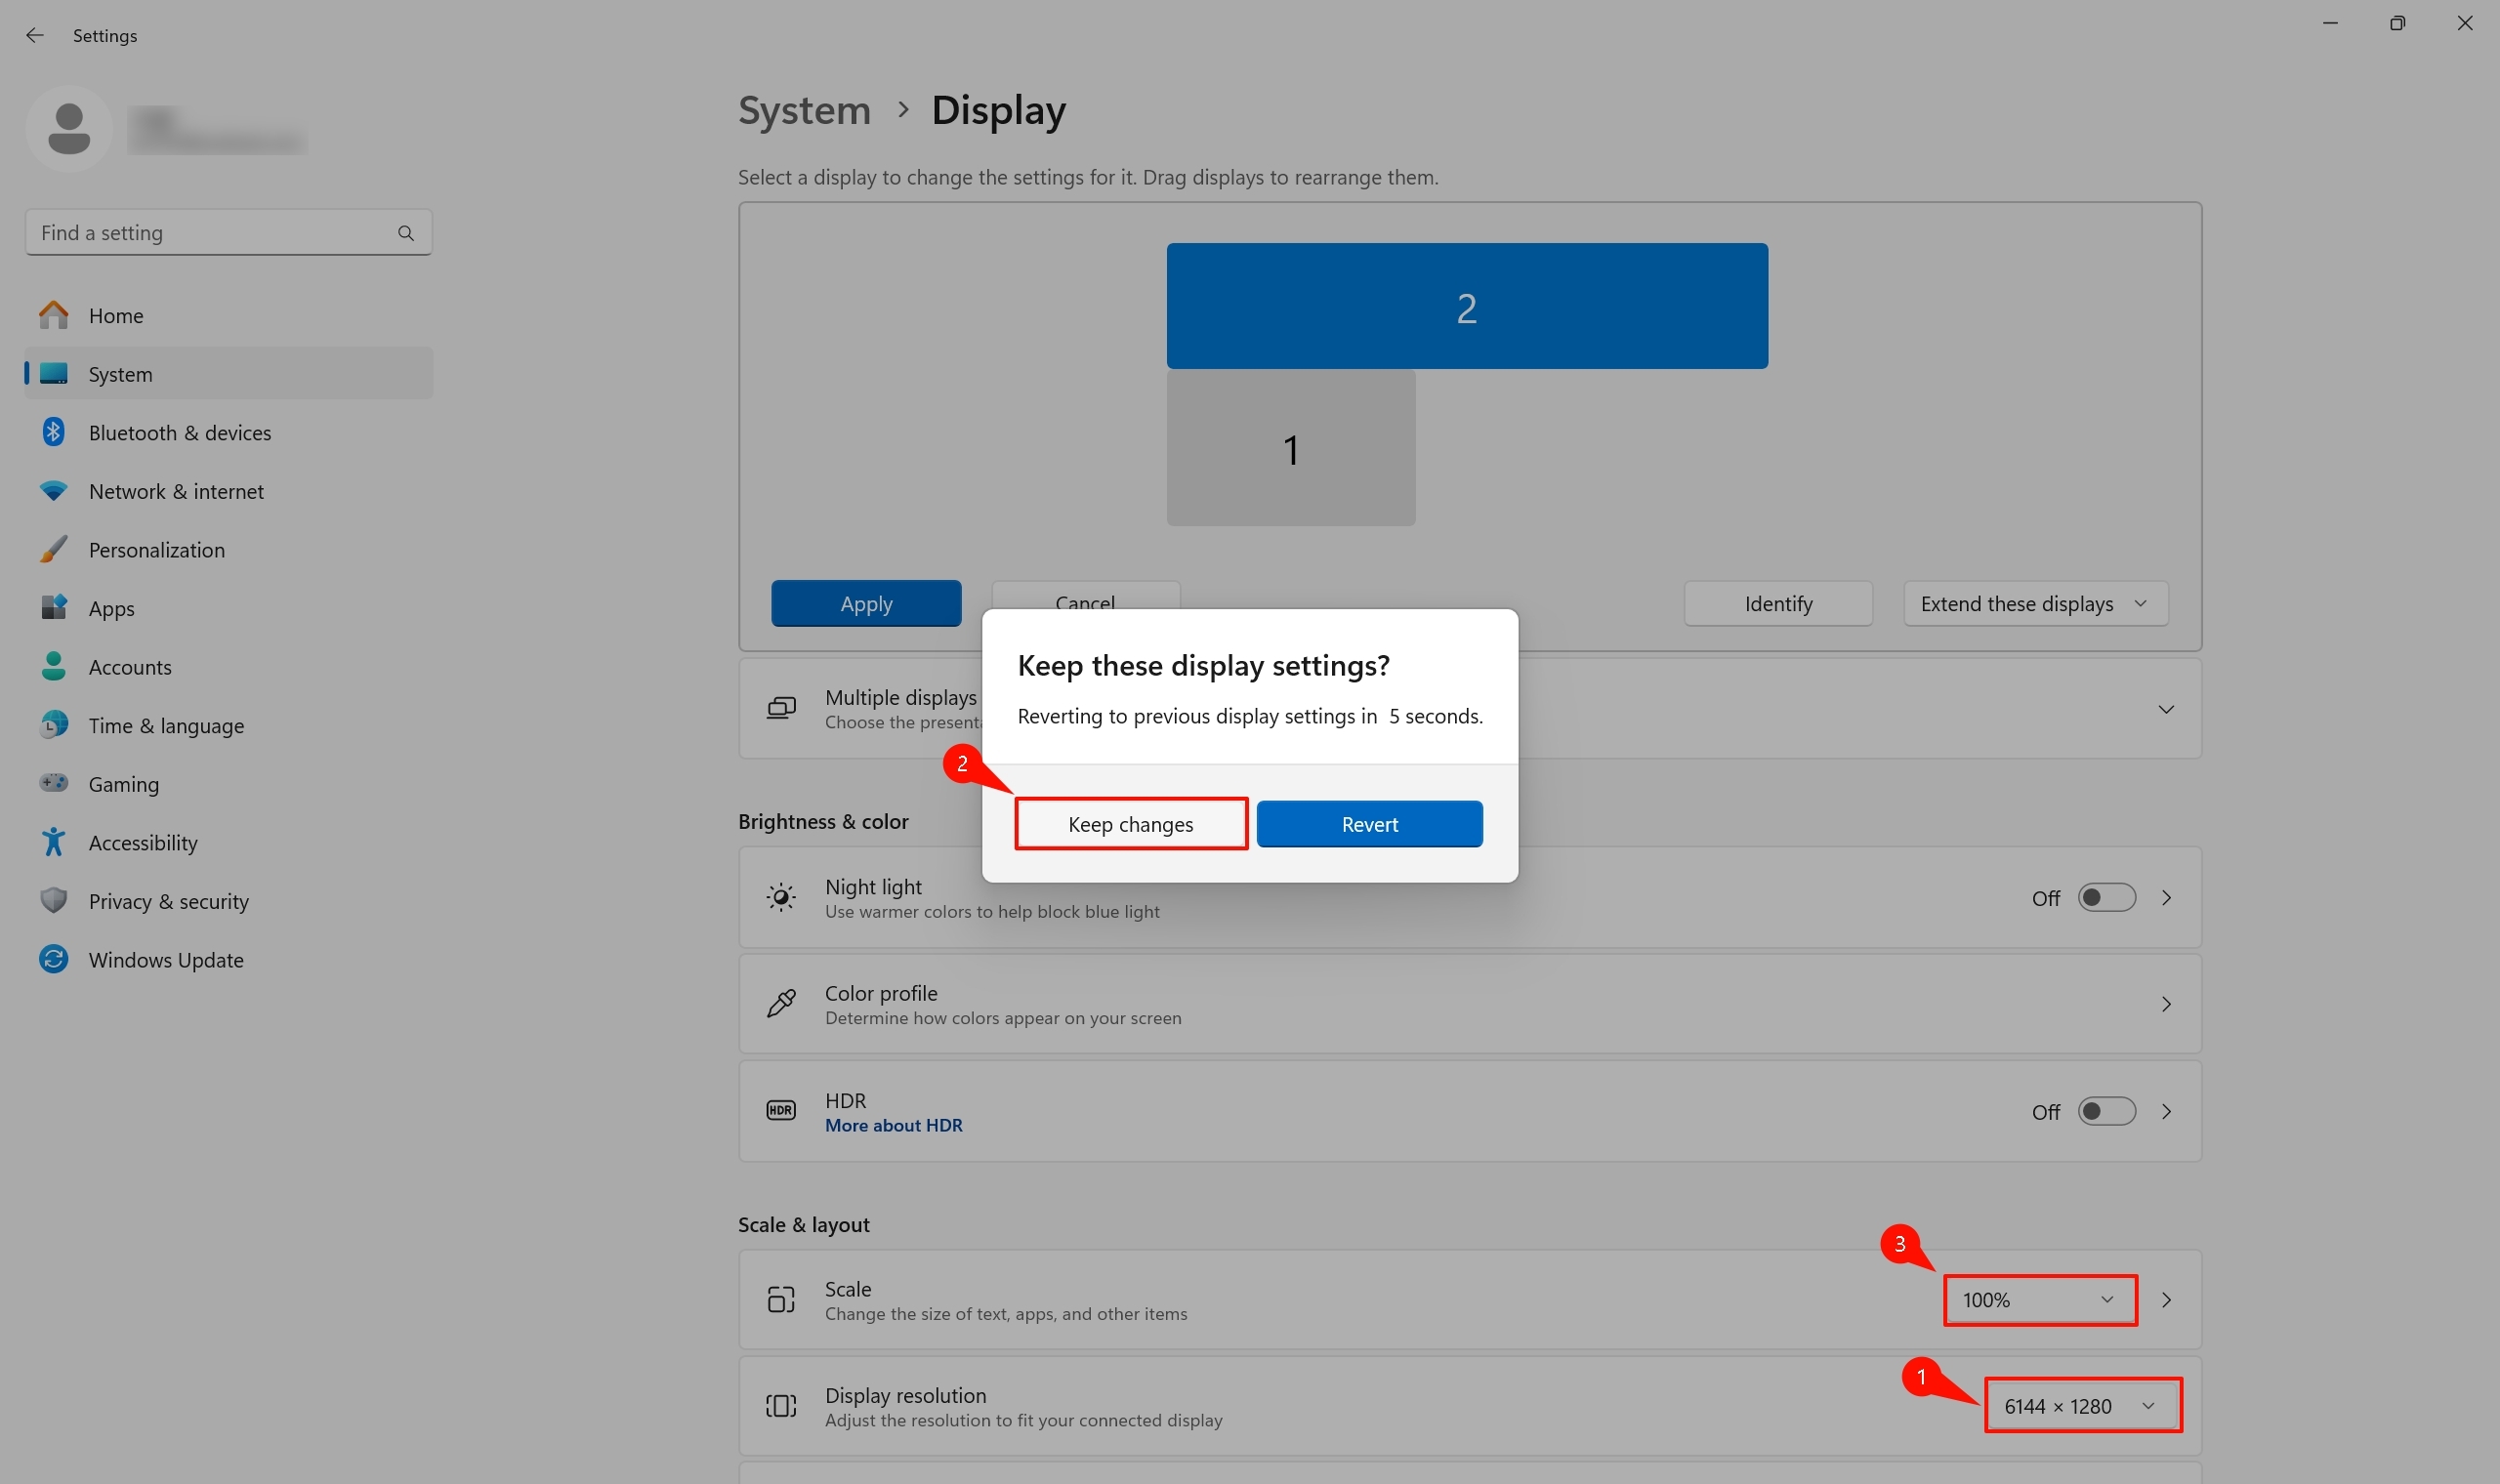
- Select the resolution you just created in Display resolution, keep changes and make sure Scale is 100%.
- Return to the AMD software and set the 10bit depth and RGB444(full range) format.

- Then go to the System-Display-Advanced display interface to confirm that the system output is normal and consistent with the requirements, which same as NVIDIA settings above.
¶ 3. Resolution theoretical calculation
¶ 3.1 Obtain pixel clock at required resolution
- Method 1:Get the "total pixel clock" by customizing "CVT - Reduced Blanking" on the graphics card;

- Method 2:Use the Video Timings Calculator https://tomverbeure.github.io/video_timings_calculator to calculate the Pixel Clk and total values;

¶ 3.2 Calculate the final pixel clock based on color space and depth
| RGB444 | YUV444 | YUV422(HDMI) | YUV422(DP) | YUV420 | |
| 8 bit |
Pixel_Clk_444_8bit = Pixel_CIk |
Pixel_Clk_422_8bit = Pixel_CIk |
Pixel_Clk_422_8bit = Pixel_CIk x 2 / 3 |
Pixel_Clk_420_8bit = Pixel_CIk x 0.5 |
|
| 10 bit |
Pixel_Clk_444_10bit = Pixel_CIk x 10 / 8 |
Pixel_Clk_422_10bit = Pixel_CIk |
Pixel_Clk_422_10bit = (Pixel_CIk x 10 / 8) x 2 / 3 |
Pixel_Clk_420_10bit = (Pixel_CIk x 10 / 8) x 0.5 |
|
| 12 bit |
Pixel_Clk_444_12bit = Pixel_CIk x 12 / 8 |
Pixel_Clk_422_12bit = Pixel_CIk |
Pixel_Clk_422_12bit = (Pixel_CIk x 12 / 8) x 2 / 3 |
Pixel_Clk_420_12bit = (Pixel_CIk x 12 / 8) x 0.5 |
|
|
Note: If the pixel value is less than the maximum pixel_CIk, it will definitely work if the graphics card interface supports it. If it is within 105% of the maximum pixel_CIk, actual test results should be used to confirm. For example, for 6144*1280@60Hz RGB444 10bit: Pixel_CIk_444_10bit = 498MHz*10/8 = 622.5MHz. |
|||||
¶ 3.3 Interface Capacity checking
Based on the requirement of 6144*1280@60Hz, RGB444 10bit, and checking the maximum DP1.2 resolution of different devices according to their specifications.
We found that the H-series DP1.2 supports a maximum of 4096x2160@30Hz with RGB444 10bit, which is 279.5x10/8 = 349.375M, less than 622.5M, and therefore unsupported.
The COEX series DP1.2 interface, on the other hand, supports a maximum of 4096x2160@60Hz with RGB444 10bit, which is 567.25x10/8 = 709.0625M, which is greater than 622.5M, meeting the requirements.
¶ 4. Troubleshooting
¶ 4.1 The graphics card cannot be set to 10/12 bit
Sometimes it may not be possible to switch the bit depth to 10bit/12bit. This is a problem with the NVIDIA graphics card control interface and requires the following special method to be used.
- Switch to PC resolution first, then delete the graphics card custom resolution.
- Use the sending card LCD panel or VMP/Unico/NovaLCT to set 1920x1080@60Hz, and switch to 10bit on the NVIDIA interface.

- When 1920x1080@60Hz 10bit is normal, refer to the NVIDIA steps above to add a custom resolution and then switch.
¶ 4.2 Output resolution does not match
Sometimes the resolution in Windows display settings is correct, but the resolution recognized by the sending card is inconsistent with it.For example, the resolution is set to 3840x2160@60Hz on the PC, but it is recognized by the sending card as 1920x1080@60Hz.
There are several possible reasons:
- Insufficient graphics card capabilities. This issue is more likely to occur with integrated graphics. You can try replacing your computer with a discrete graphics card such as NVIDIA/AMD to test and verify.
- Cable issue. Try replacing the video cable with a higher standard. Use a standard cable such as HDMI to HDMI/DP to DP instead of an adapter cable such as HDMI to DP.
- If you confirm that the computer performance and video cable meet the standards, you can try the following methods:
Switch to another resolution in the Display adapter properties and apply it, then switch back to the required resolution.